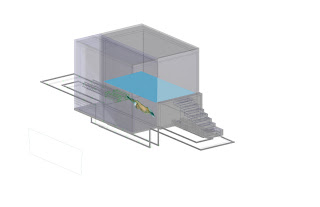
 A rear view of the structure. I am currently trying to adjust the lighting in Flamingo/Rhino to highlight the transparency which is shown in yellow. Please feel free to give me some suggestions.
Tuesday, November 18, 2008
Friday, November 14, 2008
Pool Renders
 Interior render of one of the "pods." Rendering is done with Flamingo. I simply used two point lights directed from either end of the pool and two rectangular lights on the top and side. This view is a representation of what the swimmer would experience before diving in. Entourage, water, and color are in the process of being added.
An early stage render of the main support system for the "pods." The column was to be made of reinforced concrete with tie rods cantilevering out to support the frame of the pool. This support system was to be modified after the critique with the structural engineers.
Thursday, October 30, 2008
Wednesday, October 22, 2008
Tuesday, October 21, 2008
Tuesday, October 14, 2008
Transparency

The image is a detail of the pipe filtration system in each "pod" of my pool design. There are two propeller systems in each pod. The pipe and propeller are enclosed in a box that is supporter by a steel truss that runs underneath the main floor on each level. Modeling was done in FormZ and Illustrator. The solid image behind is covered by its wireframe origin; leaving a transparent detail of its interior.
Thursday, October 9, 2008
Ex. 3-1


Ex. 3-1
Physical model created by modeling in FormZ then edited in Illustrator and CAD before being sent to the laser cutter. The goal was to put together the model without using any glue. The second image shows a nice balance with the outside studs on the right blurred; leaving the inside clear and focused. Materials are 1/8" MDF.
Subscribe to:
Posts (Atom)


